
Portfolio work can help people discover your business when it teaches them how you solve a problem they recognize. Give each project a clear audience, a brief, a few visible decisions, honest evidence, and a useful next step. Then share parts of that story in places where those people already learn.
A designer's finished identity, a writer's article, and a creator's product video each show a skill. A project story adds the context a prospective client needs to understand where that skill fits. It also gives you educational material to publish: a useful explanation of a decision, a demonstration, or a checklist drawn from the work.
This guide offers a practical BrandTofu process for turning one project into those materials. It is an editorial framework, with illustrative examples. It cannot predict how many inquiries a project will bring.
Choose a reader and a buying situation
Start with a sentence about the person you want the project to help. Include the situation that could lead them to seek outside support.
For example: “An independent footwear brand preparing its first product launch needs short videos that make the shoe easy to recognize on a phone.” That sentence gives you a reader, a moment, and a communication problem.
Try the same exercise for other work:
- A local restaurant needs a menu that first-time visitors can scan quickly.
- A software marketing team needs an introductory article that explains a difficult product category.
- An event organizer needs a speaker announcement that helps unfamiliar people understand the event's theme.
These are working hypotheses. Ask people in the intended audience how they describe the task and what makes choosing a creative partner difficult. Use those conversations to refine your wording. A polished project can still reach people whose needs differ from the work you want to sell.
Choose a focused example for your next project story. You can keep a broader portfolio organized into sections for different services and audiences.
Build a project story with five parts
Behance's portfolio guidance recommends selecting relevant work and describing its scope, client, and process. That gives a reader a way to understand the images. The five-part structure below turns that principle into a repeatable publishing exercise.
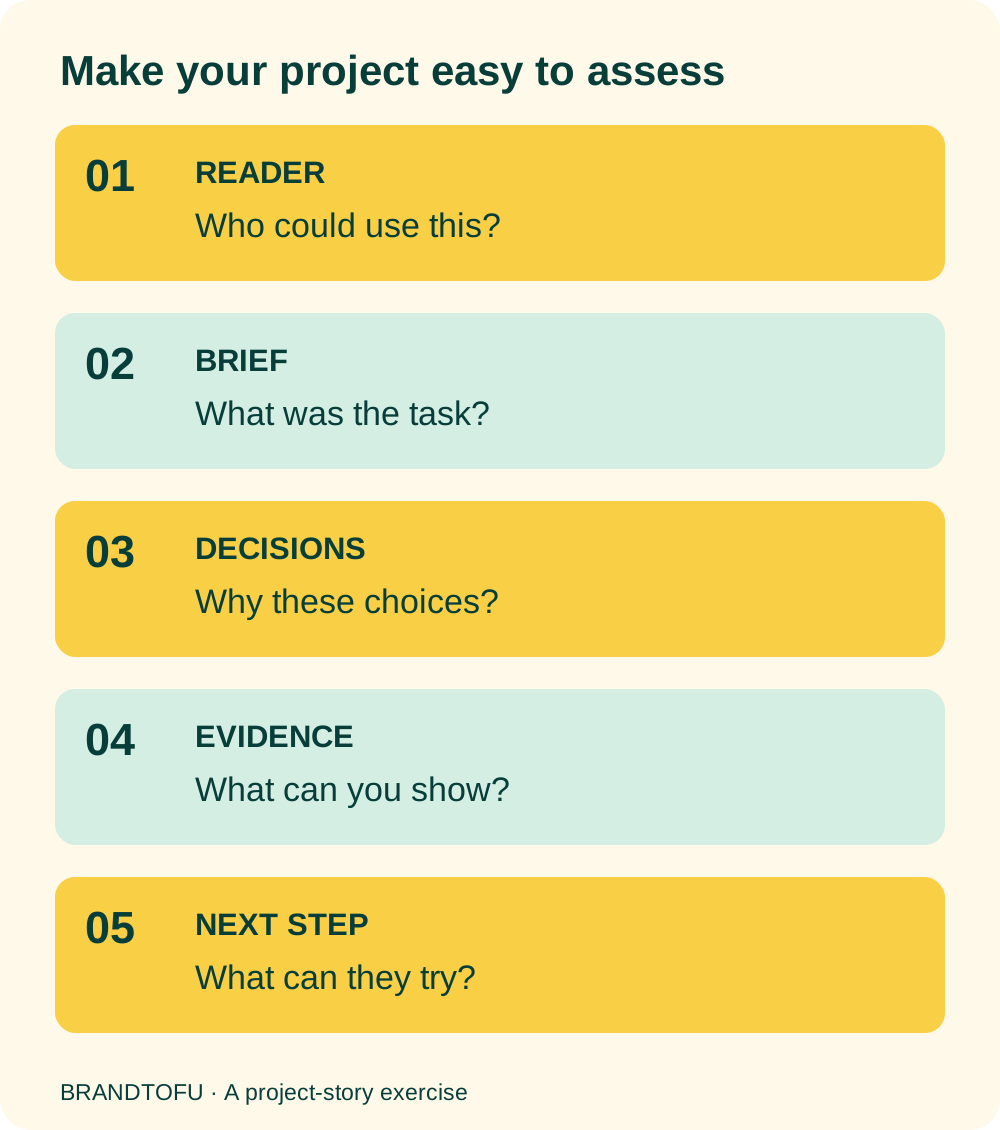
1. Reader: who could use this?
Write a headline that names the task or communication problem. “Making a launch shoe recognizable in a short video” is a useful project-story headline. The maker's style and tools can appear in the description.
Keep the headline faithful to the work. A classroom exercise about a menu can explain menu layout. It cannot establish that a restaurant gained customers.
2. Brief: what did the work need to do?
A brief is a short statement of the assignment. Describe the audience, intended use, requirements, and constraints. Name your role and collaborators so the reader can see which decisions were yours.
For the footwear example, an illustrative brief could be: “Create a short, silent-friendly product concept for a fictional shoe label. Show the side profile, use one background color, and leave room for a launch message.” That makes the work inspectable. Readers can compare the finished asset with the stated assignment.
For a real client project, get permission to share the work, details, and any results. Choose a different example when permission is unavailable.
3. Decisions: what changed, and why?
Choose two or three decisions that help a reader learn something. Show the relevant sketch, draft, crop, storyboard, or comparison next to a short explanation.
For example: “I kept the background still so the shoe's outline was easy to follow.” Or: “I replaced three introductory paragraphs with a labeled example because first-time readers needed a concrete starting point.”
Tie each explanation to visible work. A screenshot of an actual revision lets someone assess the reasoning. A long list of tools offers less information about that specific choice.
Nick Longo's case-study guide on Behance shows how to organize a project around its challenge, process, solution, and reflection. It is useful when you have a folder full of assets and need to choose a sequence.
4. Evidence: what can you establish?
Describe the evidence you have and its limits. Useful evidence can include a finished deliverable, a documented revision, a client's approved feedback, or a measured result with context.
For a personal concept, show what you made and how you checked it. For example: “I reviewed the clip at phone size and changed the opening crop after the shoe left the frame.” That is a process observation. Label it as such.
For published client work, a result needs a source, a period, and a definition. If the client permits you to report views, say where that number came from and whether paid promotion was involved. Explain other campaign changes that may have affected the result. A project completed during a sales increase does not establish that the project caused it.
If you have no performance data, say so. You can still make a useful story about the brief, execution, and learning.
5. Next step: what can the reader do?
Give the person a natural way to continue. A full project page could link to the relevant service and a simple contact route. An educational post could end with one check the reader can try on their own work.
For example: “Play your opening shot at phone size with the sound off. Can a new viewer identify the product?” This gives the reader a useful task even if they never hire you.
Label concept work clearly
Personal projects give you room to demonstrate the assignments you want to pursue. Behance's feature on personal projects includes artists explaining how their own explorations connect with commissioned work. Those individual experiences illustrate a possible route; they do not establish a typical outcome.
Put the status of your project close to its title: “Self-initiated concept for a fictional brand. No client commission or campaign results.” Repeat the label on assets that may travel separately, including video captions and image posts.
Use a fictional product or your own materials when that helps keep the example clear. Distinguish an imagined brief from customer research. If you use AI to produce part of the work, explain its role, the decisions you made, and the checks you performed. Review product shape, lettering, continuity, and any claims frame by frame before presenting an AI product concept.
Worked example: draft the story before choosing posts
A fresh LinkedIn question from a product-video creator prompted this guide. The creator described regularly sharing videos and asked how to improve the work and attract clients. That question brings together several possible problems: the work itself, the explanation, the audience reached, and the route to an inquiry.
Posting history alone cannot identify which problem applies. A useful starting exercise is to turn one piece into a project story and ask relevant people what they understand from it.
For the demonstration, we wrote a fictional footwear concept in Dillinger, a browser-based Markdown editor. Markdown is plain text with simple formatting marks, such as ## for a heading. Dillinger's current public description says basic editing and live preview are free and require no account. We checked that access on October 16, 2026. Any text editor can support this exercise.
- Write the intended reader and project status at the top.
- Add the brief and one decision the finished work can demonstrate.
- Add an evidence statement and an explicit limit on results.
- Preview the draft and check whether it makes sense to a reader who has never met you.
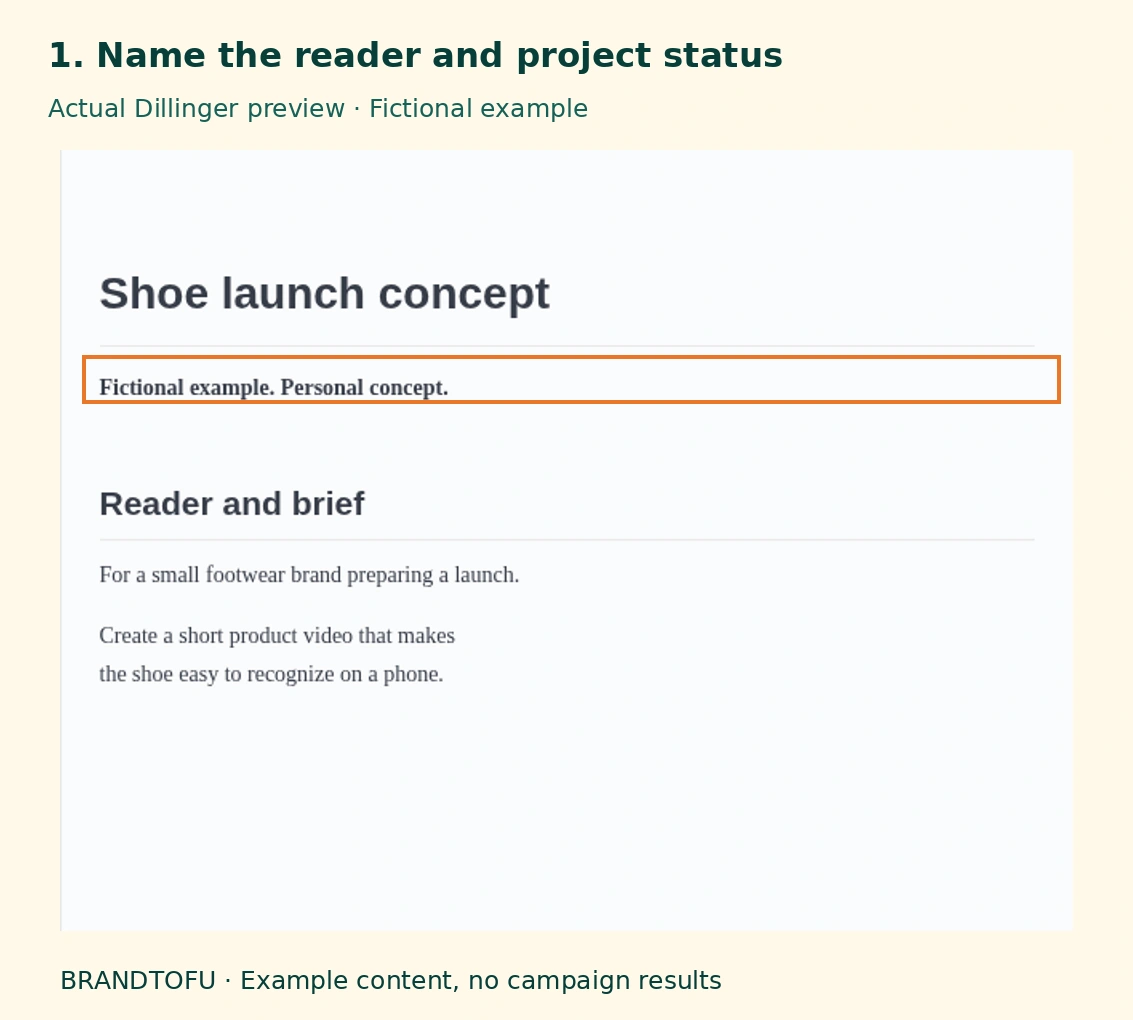
Our example's decision is to open with a still side profile, then introduce motion. The evidence is a storyboard and an export review. The concept has never run as an advertisement, so its story contains no claims about sales or campaign performance.
Use a short feedback session to test comprehension. Ask a few people who resemble your intended reader: “What task would you hire this person for?” “Which part helps you judge the work?” “What would you need to know next?” Record their actual answers. A small convenience sample gives you clues for revision; it does not represent the whole market.
Turn the project into three useful pieces
Keep a complete project page as the home for context, credits, and evidence. Draw smaller pieces from it for discovery.
A decision post: Show one comparison and explain the reason for the choice. A designer might show how a menu's headings changed. A writer might explain the order of an introduction. Give the reader enough context to understand the example on the platform.
A short demonstration: Show the starting point, an action, the result, and what the result means. A video creator could demonstrate checking the first frame at phone size. A researcher could show how anonymized notes become a theme, using approved or clearly labeled example data.
A practical checklist: Turn a repeated part of the work into a useful check. An event designer might share three questions for reviewing a speaker card: can people read the name, identify the subject, and find the date?
Each piece should teach something on its own. Link to the full story where the extra detail helps and the venue permits it. For the handoff, approval, and publication checks, use our social content publishing workflow.
Put the lesson where the intended reader learns
Choose a small distribution test based on the audience sentence. For a product creator, that might include an owned portfolio page, a native post about one production decision, and participation in a public discussion where someone is asking about that decision.
Read the discussion and its rules before joining. Answer the question in the conversation. Disclose your relationship when linking your own example. Keep personal messages within the permissions and expectations of the recipient.
Collaborators can also help a project reach relevant people. Agree on credits, approvals, and where the work may appear before publishing. A writer and illustrator could each explain a different part of the same approved project. Both accounts should keep the project status and claims consistent.
Start with a manageable test you can finish and review. For example, publish one complete story and two useful excerpts over two weeks. This is an example of a test plan, not a recommended universal cadence.
Read the response and choose the next revision
Keep a small record of the asset, intended reader, publication URL, response, and next action. Separate discovery signals from business inquiries.
- Views tell you that an asset was displayed or watched under the platform's definition. They do not identify every viewer's needs.
- Specific questions and relevant comments can reveal what people understood and what remains unclear.
- Portfolio visits show a further action when you can measure them, though attribution may be incomplete.
- Inquiries give you a chance to learn which project the person saw, what they need, and whether the service fits.
If people misunderstand the assignment, revise the headline and brief. If they understand the assignment but cannot assess your contribution, show a decision and supporting work. If the relevant people never see the material, revisit distribution. If inquiries are a poor fit, compare them with the audience and service description.
Keep the original version and your notes. The next project story can build on what you observed.
Behance: building a design portfolioPractical first-party guidance on selecting relevant work and explaining scope and process.↗ Nick Longo: building a case studyAn experienced studio owner's structure for explaining the challenge, process, solution, and reflection.↗ Behance: personal projectsInterviews about self-initiated creative work, with individual examples and their context.↗